
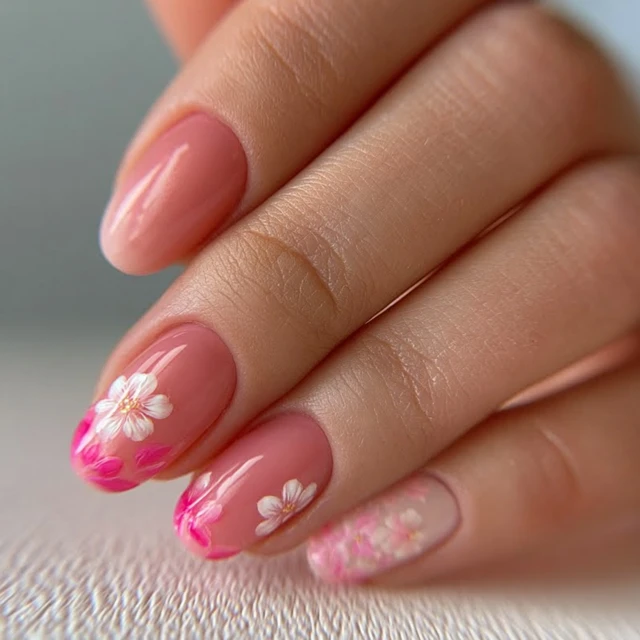
Spring 2026 is almost here, and the first thing I want to do is swap out my winter nail colors for something that actually blooms. 3D flower nails are the standout trend this season—not just a flat decal, but real sculpted petals that catch the light. I’ve been experimenting with these designs for years, and the trick is all in the technique: the right gel consistency, the perfect dot size, and a steady hand. Let me walk you through how to get these flowers to pop and stay put.

Why 3D Flowers Work for Spring 2026
Flat floral prints are fine, but 3D flowers add texture and dimension that make your nails look like tiny garden sculptures. The key is using a thick enough gel so the petals hold their shape without drooping. I always use a high-viscosity builder gel or a thick gel polish for the petals—it gives that raised, glossy finish. For spring 2026, think pastel bases with contrasting bright petals: white nails with pink and yellow flowers, or a soft lavender base with mint leaves. The color palette is fresh and optimistic, exactly what you want after a long winter.
Essential Tools and Materials
You don’t need a salon kit to get started. Here’s what I rely on:
- UV/LED lamp – for curing gel layers quickly. I cure at 36 watts for 30-60 seconds per layer.
- Dotting tool – the most important tool for flower petals. A medium-sized dot (about 2mm) gives the best proportion for a 5-petal flower.
- Fine detail brush – for pulling petals into shape and adding leaf veins.
- Gel polishes – white base, pink and yellow for flowers, green for leaves. I prefer soak-off gels for easier removal.
- Top coat – a no-wipe top coat saves time, but a wipe-off top coat gives a glass-like shine. I use a thick top coat to encapsulate the 3D elements fully.
Step-by-Step: Creating the 3D Flower
Start with clean, prepped nails. Apply a base coat and cure. Then two thin coats of white gel, curing each. White makes the flowers pop, but you can use any pastel base.
Making the Petals
Dip your dotting tool into pink gel. Place five dots in a circle on the nail—each dot about 2mm in diameter. The spacing matters: leave a small gap in the center. Cure these dots for just 10 seconds to set the shape slightly. Then, with a fine brush, gently pull each dot inward toward the center. This creates a teardrop petal shape. Cure fully for 30 seconds. If you want larger flowers, use a bigger dot or add a second layer of petals on top.
Adding the Center and Leaves
Use a smaller dotting tool (1mm) to place a yellow dot in the center. Cure for 30 seconds. For leaves, paint small teardrop shapes with green gel, then use a fine brush to draw a thin line down the middle. Cure for 30 seconds. I like to add two leaves per flower, angled outward.
Sealing Everything
Apply a generous top coat. This is the step most people mess up—they apply too thin a layer, and the 3D petals get flattened. I use a thick top coat and paint it carefully over each petal, making sure it flows around the edges. Cure for 60-90 seconds. Wipe off the tacky layer with alcohol if needed. Finish with cuticle oil for a healthy glow.
Common Mistakes and How to Avoid Them
The biggest mistake is rushing the curing. If you don’t cure each layer fully, the petals will smudge when you add the top coat. Another mistake is using too thin a gel—it won’t hold the 3D shape. Stick with thick gel polishes or builder gels. Also, don’t overload your dotting tool; a small dab is enough. Too much gel creates blobs, not petals.
Design Variations for Spring 2026
You can adapt this technique to different looks. Try a single accent nail with a large 3D rose, or cover all nails with tiny daisies. For a more subtle vibe, use sheer nude base with white and lavender flowers. I’ve also seen ombre bases (pink to white) with 3D flowers on the tips—stunning for spring weddings. For a bolder look, add gold leaf flecks around the flowers before top coat.
Safety and Care Tips
Gel polishes contain acrylates, which can cause allergic reactions in some people. Always do a patch test on a small area of skin 24 hours before full application. If you experience redness or itching, remove the gel immediately and consult a dermatologist. Keep your tools clean by wiping them with alcohol between uses. Avoid soaking your nails in water for long periods to prevent lifting. When it’s time to remove, soak in acetone for 10-15 minutes—never pry off the gel, as that damages the nail plate.
Takeaway
3D flower nails are the perfect way to welcome spring 2026. With the right gel consistency, precise dot placement, and a thick top coat seal, you can create blooms that last for weeks. Start with one accent nail to build confidence, then go full garden. Your nails will be the talk of any spring gathering—no salon appointment needed.
Frequently Asked Questions
How long do 3D flower nails last?
With proper application and top coat sealing, 3D flower nails can last 2-3 weeks. Avoid picking at the design and apply a fresh top coat every few days to maintain shine and prevent lifting.
Can I do 3D flower nails without a UV lamp?
Yes, you can use air-dry gel or acrylic powders to create 3D flowers without a UV lamp. However, UV gel offers faster curing and a longer-lasting finish. Air-dry options may require more drying time and care.
What colors are trending for spring 2026 3D flower nails?
Pastel pinks, soft lavenders, buttercup yellow, and mint green are key spring 2026 colors. White bases with contrasting bright petals also remain popular. You can mix and match for a personalized look.