
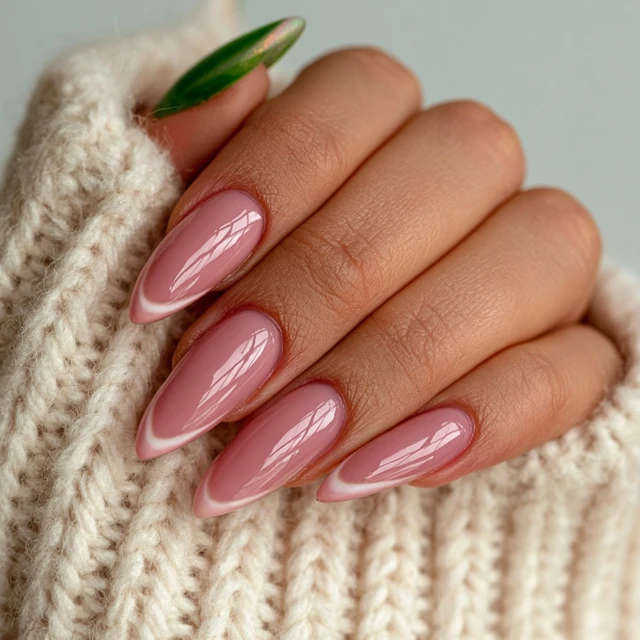
There’s something about a neutral manicure that just works. It doesn’t shout. It doesn’t fight with your outfit. It just sits there, clean and quiet, making your hands look like you’ve got it all together — even when you’re elbow-deep in campfire coals. I’ve been perfecting my approach to almond inspo neutral nails, and I want to share the technique that’s become my go-to. It’s not complicated, but the details matter.

Why Almond Shape Works for Neutral Nails
Almond nails have a way of elongating the finger. The tapered tip draws the eye upward, making hands look more elegant. For neutral shades — those soft pinks, beiges, and milky whites — the shape adds structure. A round or square tip can make a pale polish look flat. The almond curve gives it life.
The key is the ratio. I keep the length about twice the width of the nail bed. Too short, and it looks like a rounded square. Too long, and it becomes stiletto territory. That 2:1 ratio is my sweet spot. It’s practical enough to still open a foil packet but refined enough to feel special.
Filing Technique: The Camp Cook’s Method
I file with the same care I use to sharpen a knife — slow, deliberate, and with the right tool. A 180-grit file is ideal. Start at the side of the nail, angling the file toward the center tip. Use long, single-direction strokes. Don’t saw back and forth. That creates micro-fractures that lead to peeling.
File each side equally. Check symmetry by looking at the nail from the tip down. The center point should line up with the middle of your cuticle. If it’s off, adjust by filing the heavier side just a little more. I do this under natural light — campfire light is too warm and can hide unevenness.
Choosing the Right Neutral
Not all neutrals are created equal. A shade that looks perfect in the bottle can wash out your skin tone or flash too pink. I look for a polish with a hint of warmth — something that mimics the natural flush of a healthy nail bed. For most skin tones, a sheer milky pink or a soft beige works best.
Test it on one nail first. Paint a single coat and let it dry. If it looks like your nail but better, that’s the one. If it looks chalky or gray, move on. The polish should disappear into your nail, not sit on top of it. That’s the whole point of a neutral.
Application: Thin Coats, Clean Lines
This is where the camp cook in me comes out. I apply polish like I apply oil to a cast iron skillet — thin, even layers. Start with a base coat. Let it dry until it’s tacky, about two minutes. Then the first coat of color: one stroke down the center, then one on each side. Keep the brush barely loaded. A thick coat will bubble and streak.
Wait three minutes between coats. I use that time to clean up any mistakes with a small brush dipped in remover. The second coat builds opacity. For most neutrals, two coats is enough. If the shade is very sheer, three thin coats are better than two thick ones.
Seal it all with a top coat. Cap the free edge — that little swipe along the tip — to prevent chipping. I use a quick-dry top coat so I can get back to camp life sooner.
Drying: The Patience Test
Drying is the hardest part. I’ve ruined more manicures by being impatient than by bad technique. Set aside 15 minutes of no-touch time. Sit somewhere cool and shaded. Avoid heat — it softens the polish. And never, ever use a camp stove or fire to dry your nails. Polish is flammable, and the heat can cause burns. Just wait.
After 15 minutes, apply cuticle oil. It hydrates the skin and makes the whole manicure look polished. I carry a small bottle in my camp kit. One drop per nail, rubbed in gently.
Making It Last in the Wild
A manicure at a campsite faces challenges: dirt, water, fire, and the occasional scraped knuckle. To keep your almond inspo neutral nails looking fresh, reapply top coat every two to three days. That single layer adds a week of life. Wear gloves when washing dishes or handling firewood. And don’t use your nails as tools — no opening cans, scraping labels, or prying things apart. Treat them like the delicate instruments they are.
The Takeaway
Neutral almond nails are about precision and restraint. A good file, a thin coat, and a little patience. That’s it. No gimmicks, no complicated art. Just clean, elegant nails that work at the campsite and beyond. And that’s something worth obsessing over.
Frequently Asked Questions
How do I get the perfect almond shape without breaking my nails?
File from the sides toward the center tip, using gentle, even strokes with a 180-grit file. Never saw back and forth — that weakens the nail. Keep the tip centered and the curve smooth, like a rounded triangle. Start with a slightly longer nail; short nails can look squoval instead of almond.
What’s the best neutral shade for a natural look?
Look for shades that match your skin’s undertone. For fair skin with pink undertones, a sheer pink like OPI Bubble Bath works. For medium or warm undertones, try Essie Mademoiselle or a beige nude. Test on one nail first to see how it dries — many neutrals look different wet than dry.
How can I make my neutral manicure last longer while camping?
Apply thin coats — thick ones chip faster. Always cap the free edge with top coat. Reapply top coat every 2-3 days. Avoid using your nails as tools (opening cans, scraping). In a campsite, keep hands away from fire and dirt; wear gloves for heavy work.
Can I use a camp stove to dry my nail polish faster?
No. Never use an open flame or stove to dry nail polish — it’s highly flammable and can cause burns. Instead, use a quick-dry top coat and let nails air dry in a cool, shaded spot. Patience is safer and gives a smoother finish.