
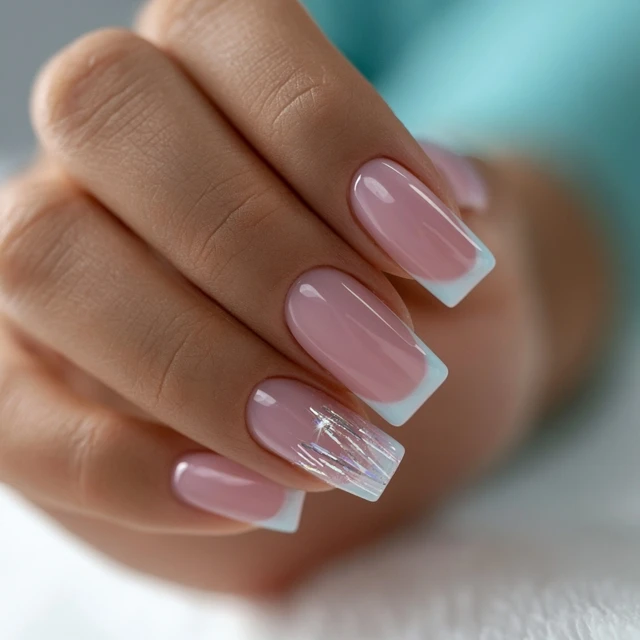
There’s a reason square acrylics have been a salon staple for decades. The clean lines, the crisp corners, the way they frame the finger—it’s a shape that says confident without shouting. But achieving that perfect geometric look takes more than just filing straight across. I’ve seen too many sets that look like tiny cinder blocks or, worse, start lifting within a week. Let’s break down the exact technique so you can deliver classic square acrylics that are balanced, durable, and genuinely flattering.

Why Square? The Structure Behind the Shape
Square nails work best on longer nail beds or when the client wants a strong, practical shape. The parallel sidewalls and straight free edge distribute force evenly, reducing the risk of breakage compared to stiletto or almond shapes. But the real secret is the apex—the highest point of the nail arch. Without a proper apex, the nail will look flat and weak. I place the apex at about one-third of the way from the cuticle, right where the stress point naturally occurs. This creates a gentle curve that mimics a natural nail and prevents the tip from flipping up.
The Apex Placement Trick
After applying the acrylic, hold the finger upside down for 10 seconds. Gravity will pull the bead into a gentle dome. If you skip this step, the apex will be too flat and the nail will feel fragile. For longer extensions, increase the hold time to 15 seconds.
Monomer and Powder Ratio: The Foundation
The biggest mistake I see is using a wet bead that’s too runny. A 1:1.5 ratio of monomer to powder gives you a medium consistency bead that holds its shape without dripping. Dip the brush, wipe one side on the rim, and pick up a small ball of powder. It should look like a pearl—moist but not dripping. If it’s too wet, the acrylic will pool at the cuticle and cause lifting. If it’s too dry, it will crumble and be impossible to shape. Practice this ratio until it feels automatic.
Filing for a True Square
Filing is where the shape comes to life. Start with a 100 grit file to remove bulk and flatten the surface. Keep the file parallel to the nail bed. For the sidewalls, file straight down from the cuticle to the free edge. Don’t angle inward or outward—the sides should be perfectly parallel. Then, file the free edge straight across, perpendicular to the sidewalls. Check the nail from the top view: the free edge should form a 90-degree angle with each sidewall. Finally, use a 180 grit file to soften the corners just slightly—no sharp edges that can snag on clothing. A 240 grit buffer polishes the surface to a glassy finish.
Common Filing Mistake: The Flare
If you file the sidewalls at an angle, the nail will flare out at the tip, making the finger look wider. Keep the file straight. Use the natural sidewall of the finger as a guide.
Finishing for Longevity
After filing, wipe the nail with a lint-free wipe and apply a thin layer of top coat. Seal the free edge—this prevents lifting from the tip. For clients who use their hands a lot, recommend a top coat reapplication every 7 days. Cuticle oil daily keeps the acrylic flexible and reduces the chance of cracks.
Adapting for Different Nail Beds
Wide nail beds: Keep the square shape but file the sidewalls slightly inward at the cuticle to create a tapered square. This prevents the nail from looking like a spatula. Narrow nail beds: A true square works well, but consider rounding the corners more to soften the look. Short nail beds: Square can make short nails look stubbier. Suggest a squoval (square with rounded corners) instead.
The Takeaway
Classic square acrylics are all about precision. Master the apex placement, keep your monomer-to-powder ratio consistent, and file with intention. Once you get those sidewalls parallel and the free edge straight, you’ll have a set that looks clean, lasts longer, and makes your clients feel put-together. And isn’t that the whole point?
Frequently Asked Questions
Why do my square acrylic nails keep lifting at the cuticle?
Lifting at the cuticle usually happens when the nail plate isn’t fully dehydrated or when acrylic touches the skin. Make sure you use a good dehydrator and primer, and keep the acrylic bead slightly away from the cuticle line. Also, avoid getting monomer on the skin during application.
What is the ideal monomer to powder ratio for square acrylics?
A 1:1.5 ratio (one part monomer to one and a half parts powder) works well for a medium consistency bead. This gives you enough control to sculpt the apex and sidewalls without the acrylic running or being too dry. Adjust slightly if your environment is very humid or dry.
How do I keep the square shape from looking bulky?
File the sidewalls straight and parallel, and keep the free edge thin—no more than 2-3 mm thick. After filing, check the nail from the side view: the apex should be the thickest point, tapering to a thin edge. Use a 180 grit file for final shaping to avoid over-thinning.