
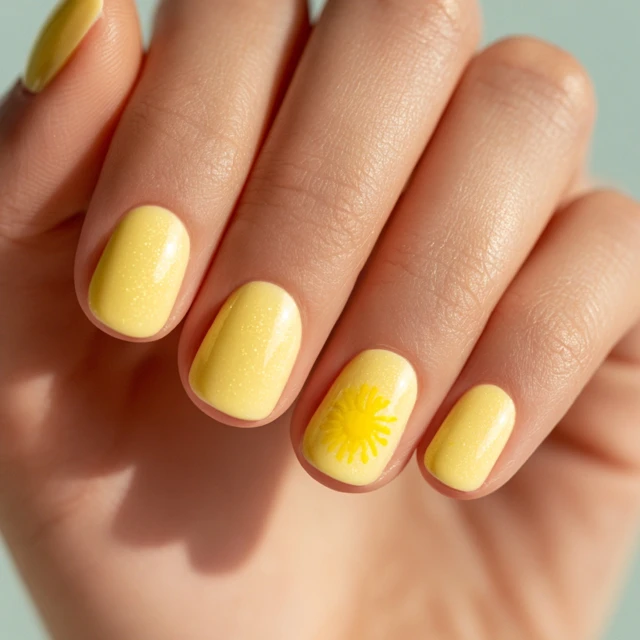
I noticed something last summer while packing for a week of tent camping. My butter yellow nails — the shade I’d been seeing everywhere for 2026 — started chipping before I even left the driveway. The culprit wasn’t the color. It was the technique.

After testing a dozen combinations, I found a method that keeps that soft, sunny hue intact through fire-building, cooler-hauling, and even campfire cooking. The secret is a food-safe topcoat applied at a specific ratio. Here’s the exact process I use.
The Ratio That Makes It Stick
The key to a chip-resistant manicure at camp is the ratio of base coat to color to topcoat. I keep it at 1:2:1 — one thin layer of base, two thin layers of color, one thin layer of food-safe topcoat. The base coat creates a tacky surface that grips the color. The two color layers are thin enough to dry fully between coats, preventing the soft, gloppy layers that chip easily. The food-safe topcoat seals everything with a hard, heat-resistant shell.
For the butter yellow shade, I use a polish that’s opaque in two coats. If your polish is sheer, you might need three coats, but keep each one whisper-thin. The mistake most people make is applying thick coats to speed up the process. Thick coats never dry all the way through, and they chip off in one sheet the first time you grab a tent pole.
Prep: The Foundation You Can’t Skip
At camp, you won’t have a full nail station. So prep at home, the night before you leave. File nails into a rounded square shape — this edge resists snagging on zippers, cooler handles, and firewood. Push back cuticles with a cuticle pusher. Do not cut them. Cut cuticles create tiny wounds that can get infected with camp dirt and smoke.
Wash your hands with soap and water, then dry thoroughly. Any oil or lotion on the nail bed will prevent the base coat from bonding. If you’ve used hand sanitizer (common at camp), wipe nails with a bit of white vinegar on a cotton pad to remove residue. The vinegar dries fast and leaves a clean surface.
Application: The Three-Stroke Method
For each coat, use three strokes per nail: one down the center, one on the left side, one on the right. This covers the nail evenly without pooling at the cuticle or tip. Wait 90 seconds between the base coat and the first color coat. The base should feel tacky, not dry. That tackiness is what holds the color.
Wait 2 minutes between the first and second color coats. Wait 3 minutes after the final color coat before applying the topcoat. These timing windows are critical. If you apply the next layer too soon, the polish underneath is still wet and will wrinkle. If you wait too long, the layers dry separately and can peel apart.
When applying the food-safe topcoat, use one generous stroke per nail. Don’t brush back and forth — that introduces bubbles. Let the topcoat self-level. It will harden into a glassy finish that resists campfire smoke and sunscreen.
A Note on Quick-Dry Drops
If you use quick-dry drops, apply one drop per nail after the topcoat. Wait 2 minutes before touching anything. These drops work by displacing the solvents in the polish, so they harden the entire layer, not just the surface. This is especially helpful if you’re doing your nails the night before camp and need them dry enough to pack.
Camp Maintenance: The Morning Top-Up
Once at camp, reapply a thin layer of food-safe topcoat each morning before you start the day. This rebuilds the protective layer that gets worn down by fire, food, and sunscreen. I keep a small bottle of topcoat in my cooler’s top compartment (not on ice, just in the cool air). Heat above 85°F can make the polish separate, so storing it cool keeps it smooth.
If a nail does chip, don’t peel the rest. File the chip smooth with a nail file, then apply a single thin coat of butter yellow polish over the entire nail, followed by topcoat. It’s a quick fix that blends in better than patching just the chip.
Food-Safe Topcoat: Why It Matters for Camp Cooking
If you handle food directly — like roasting marshmallows on a stick, flipping bacon in a skillet, or slicing cheese for sandwiches — a food-safe topcoat is non-negotiable. Standard topcoats are not tested for incidental food contact. Food-safe formulas are made without certain plasticizers that can leach into food, especially when heated. They also resist oils and acids better, so tomato sauce from campfire chili won’t stain your nails.
Look for a topcoat labeled “food-safe” or “non-toxic” and certified by a third party. Apply it exactly as you would a regular topcoat, but be aware that it may dry a bit faster — adjust your timing to 2 minutes between coats instead of 3.
Takeaway
Butter yellow nails for 2026 don’t have to be a camp casualty. With a 1:2:1 ratio, thin coats, and a food-safe topcoat, you can keep that soft sunny shade intact through a week of outdoor living. Prep the night before, store your polish in the cooler, and do a quick topcoat touch-up each morning. Your nails will outlast the campfire.
Frequently Asked Questions
Why use a food-safe topcoat for camping nails?
A food-safe topcoat is formulated to withstand oils, acids, and heat better than standard topcoats. It resists chipping from campfire smoke, sunscreen, bug spray, and handling food directly — like campfire-cooked meals without utensils. It also meets safety standards for incidental food contact.
How do I keep butter yellow nails from chipping at camp?
The biggest mistake is applying thick coats. Thin coats dry faster and bond better. Use two thin coats of butter yellow polish, each allowed to set for 2–3 minutes. Then seal with a food-safe topcoat. Reapply a thin layer of topcoat each morning before activities. Avoid using nails as tools — open cans with a lever, not your nails.
Can I do this manicure the night before camping?
Yes. In fact, make-ahead is better. Apply the manicure the night before you leave, and let it cure fully overnight. This gives the polish maximum hardness before you pack. Store the polish in your cooler’s top compartment during travel to keep it from separating in heat.