
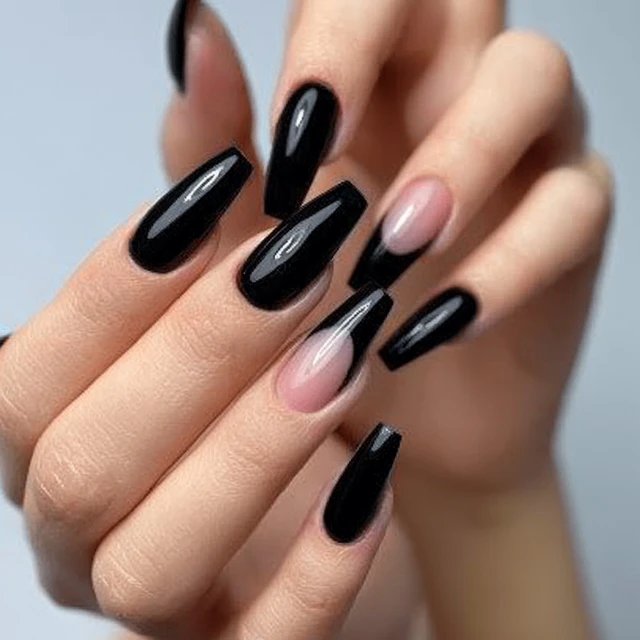
The first time I saw a set of glossy black coffin nails, I stopped scrolling. The shape—tapered sides with a blunt, flat tip—caught my eye. But the shine? That mirror-like finish made the whole look. It’s pure inspo, and I’m going to show you exactly how to get it.

Why Glossy Black Coffin Nails Work
Black is bold. Coffin shape is edgy. Together, they create a look that’s both sophisticated and fierce. The gloss amplifies the drama, reflecting light off every angle. It’s a statement that works for any occasion—from a night out to a professional setting, depending on the length.
The Key to the Perfect Coffin Shape
Getting the shape right is step one. Start with nails filed to your desired length—longer nails show the coffin shape best, but shorter versions work too. Use a coarse file to shape the sides: file straight down from the cuticle toward the tip, angling slightly inward so the tip is narrower than the base. Then file the tip straight across, creating a flat edge. The result should look like a tapered rectangle. Symmetry is everything. Check both sides by holding your hand up to a mirror.
Common Mistake to Avoid
Don’t over-file the sides. If you file too aggressively, the nail becomes weak and prone to breaking. Keep the taper gradual, and never file into the nail bed.
Getting the Gloss Right
The shine comes from the top coat, not the polish itself. After applying your base coat and two to three thin layers of black polish (let each dry fully), seal with a high-gloss top coat. Apply it generously, covering the entire nail and capping the free edge. The thicker the top coat, the deeper the gloss. Let it dry for at least 10 minutes without touching anything.
Pro Tip for Mirror Shine
For an extra glossy finish, use a no-wipe top coat. These formulas cure to a hard, shiny surface without needing a final wipe. They’re available in drugstores and online. Alternatively, a gel top coat cured under a UV lamp gives the most durable shine.
Nail Art to Try with Glossy Black Coffin Nails
Pure black is stunning, but you can add subtle accents. Try a single silver stripe down the center of one nail, or a tiny rhinestone at the cuticle. Keep it minimal—the gloss and shape do the heavy lifting. Avoid busy patterns that compete with the sleek finish.
How to Make Them Last
Longevity starts with prep. Push back cuticles, buff the nail surface lightly, and clean with polish remover to remove oils. Cap the free edge with each layer—base, color, and top coat. Avoid water for the first hour after application. Wear gloves when washing dishes or cleaning.
Takeaway: Glossy black coffin nails are pure inspo because they combine a bold shape with a high-shine finish. Focus on the shape, use thin coats, and seal with a quality top coat. You’ll have a set that turns heads.
Frequently Asked Questions
How do I get the perfect coffin shape?
File the sides straight inwards to a tapered point, then file the tip flat. Keep the sides symmetrical for a balanced look.
Why is my black polish streaky?
Streaks often happen with thick coats. Use thin, even layers and let each dry fully before the next. A good quality black polish also helps.
How can I make my glossy nails last longer?
Cap the free edge with each coat, use a high-quality top coat, and avoid soaking your nails in water for the first hour.