
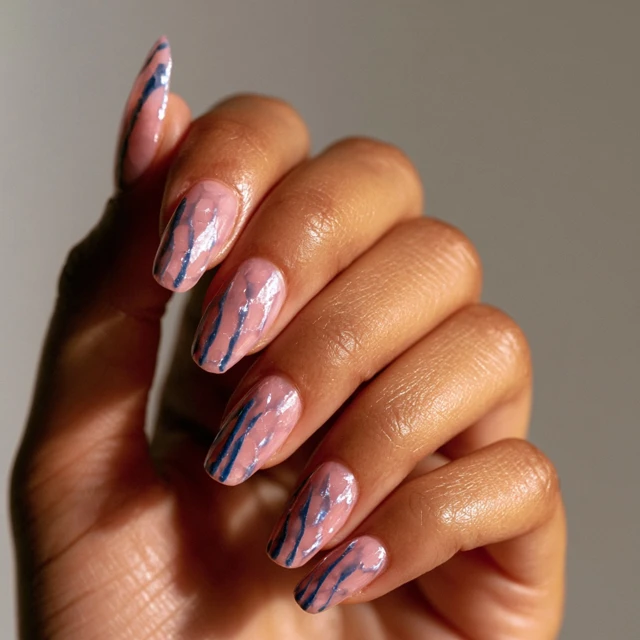
The first warm breeze of May carries something else this year—a quiet shift in nail color. Pale pinks, soft lavenders, and mint greens are showing up on screens and salon chairs. But the look that keeps catching my eye is the bloom nail: tiny, hand-painted flowers that feel more like a garden sketch than a decal. I have been testing different techniques to make these petals look delicate without requiring a steady hand from years of practice. The trick is in the ratio of polish to pressure.

Why Bloom Nails Work for May 2026
Spring nail trends usually lean toward pastels or bold neons. This year, the bloom nail sits right in the middle. It uses soft colors but adds a layer of detail that feels intentional. The flowers are small enough to wear to work, yet the design stands out. I keep the color palette to four shades: a creamy white base, two flower colors (pink and lavender), and a mint for leaves. Yellow centers are optional but add a realistic touch. The key is contrast—white base makes the petals pop without competing.
The Exact Technique for Petals That Don’t Bleed
Most floral nail art fails because the polish is too thick or the dots are too close together. Here is the method I use: start with a fully cured or dry white base. Load your dotting tool with a small bead of pastel polish—just enough to cover the tip without dripping. Place five dots in a loose circle, each about the size of a pinhead. Leave a gap between dots roughly equal to one dot’s width. Then, with a clean fine brush or a second dotting tool, gently drag each dot toward the center. The drag should be quick and light—about a 2-millimeter stroke. If you press too hard, the petal will flatten and bleed into the base. If you go too slow, the polish drags into a thread. Practice on a piece of foil or a plastic palette first. I do three practice flowers before touching a nail.
Layering for Depth
Once the first set of petals is dry, add a second layer of dots slightly offset from the first. Use a lighter shade of the same color if you have it. This creates a layered look that mimics real petals. I use a soft pink for the base layer and a sheer pink for the top layer. The difference is subtle but makes the flower look dimensional rather than flat. For the center, a single yellow dot placed after the petals are dry keeps the color from muddying.
Gel vs. Regular Polish for Bloom Nails
I have tried both. Gel polish gives you more working time because it does not dry until you cure it. That is helpful if you are a slow painter or want to adjust petal shapes. Regular polish dries fast, so you need to work in sections. If you use regular polish, paint one flower at a time and let it dry completely before moving to the next nail. A quick-dry top coat sprayed between flowers can speed things up. For gel, wipe the tacky layer after curing to keep the petals crisp. The common mistake is applying top coat too thick—it can smear the petals. Use a thin, even layer and cap the free edge.
How to Make the Design Last a Full Week
Bloom nails have more exposed edges than a solid color, so chipping can happen faster. I seal each layer with a thin top coat. For gel, I cure for 30 seconds between layers. For regular polish, I wait 2 minutes between coats. The final top coat should be applied in two thin passes rather than one thick one. Avoid hot water for the first 2 hours after finishing—this is when the polish is most vulnerable. If you are camping or cooking over a fire, wear gloves when handling pots or washing dishes. The heat and moisture accelerate wear.
Color Variations for Different Skin Tones
The same technique works with any pastel. For warmer skin tones, try peach flowers with a cream base. For cooler tones, lavender and mint on a sheer nude base. I have also tested a monochrome look using three shades of the same color—light, medium, and dark pink. The result is more subtle but still reads as floral. Avoid using white as a flower color on a white base; the petals disappear. Instead, use white as the base and let the flowers be the color.
Common Mistakes and How to Fix Them
- Petals bleeding into each other: Dots are too close or polish is too wet. Leave more space and let each layer dry before adding the next.
- Flowers look like blobs: Too much polish on the dotting tool. Wipe the tool clean between each flower and reload with a smaller bead.
- Yellow center smears: Applied before petals are dry. Wait until petals are completely set, then add the center dot with a light touch.
The Takeaway
Bloom nails for May 2026 are about restraint—using a limited palette and a simple technique to create something that looks intricate. The ratio of polish to pressure, the spacing of dots, and the patience between layers are what separate a blurry mess from a tiny garden. Start with one flower on your ring finger. If it works, add more. If it does not, wipe it off and try again. The practice flowers on foil are not wasted time—they are the difference between good nails and great ones.
Frequently Asked Questions
How do I make the petals look even?
Use the same amount of polish on your dotting tool for each dot, and drag them at the same angle toward the center. Practice on a palette first.
Can I do this design with regular nail polish?
Yes. Work quickly to prevent drying, and use a fast-drying top coat to seal the design. Thin layers are key.
What if I don’t have a dotting tool?
Use the tip of a bobby pin, a toothpick, or the back of a pen cap. For petals, a fine paintbrush or even a sharpened pencil can work.