
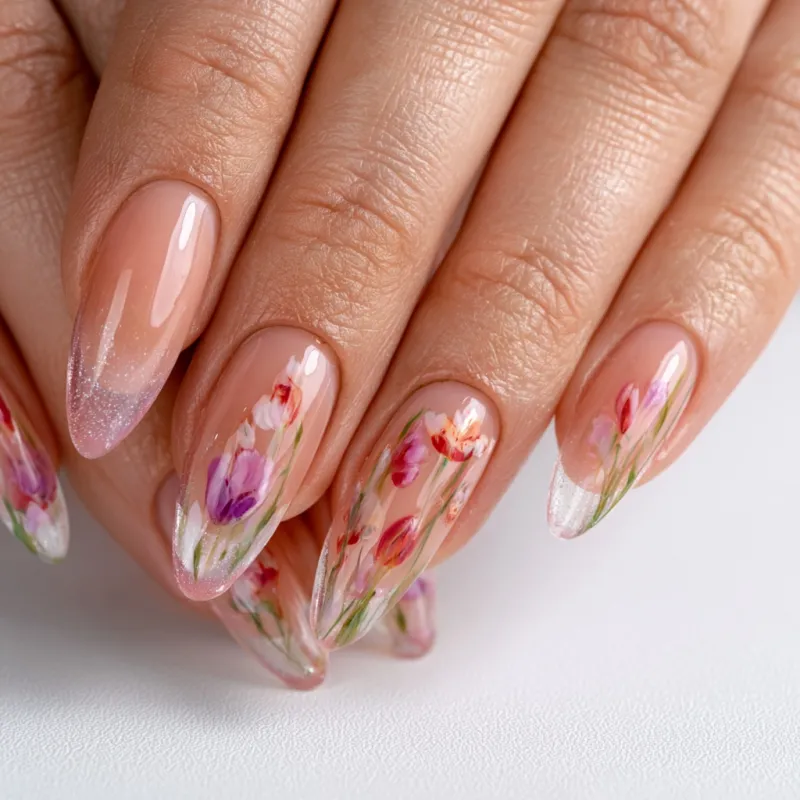
There’s something about the first warm week of spring that makes me want flowers on my nails. Not the thick, 3D acrylic kind that catch on everything, but delicate, hand-painted petals that look like they were plucked straight from a garden and pressed under glass. I’ve been seeing these floral designs everywhere—on social feeds, in my inspiration folders, even on baristas handing me my coffee. And the best part? They’re simpler to paint than you’d think.

The Secret to Petal-Like Strokes
The technique that changed my floral nail art forever is something I call the loaded brush pull. Instead of painting each petal as a solid shape, you load the brush with polish, then pull it outward from the center in a single, slightly curved stroke. The polish naturally thins at the tip, mimicking the soft edge of a real petal.
Here’s how it works: dip the tip of a fine detail brush into your polish—just the tip, not the whole bristle. Wipe one side of the brush against the rim of the bottle to remove excess. You want a small bead of color on one side of the brush. Place the bead at the center of where you want the flower, then drag the brush outward in one smooth motion, releasing pressure as you go. The stroke should be about the length of a grain of rice. Repeat for each petal, spacing them evenly around the center.
The most common mistake is overloading the brush. Too much polish creates a blob that loses all definition. If your first stroke feels too thick, wipe the brush clean and start again with less. Practice on a piece of paper or an old nail swatch stick first—it takes a few tries to get the feel for the pressure and speed.
Step-by-Step Floral Design
Prep the Canvas
I always start with a clean, dry nail plate. Apply a thin layer of base coat and let it dry completely. For this design, I use a soft pastel pink or pale cream as the base color—two thin coats, each drying fully. The base should be smooth and even; any bumps will show through the flower strokes.
Paint the Petals
Using the loaded brush pull technique, paint five to six petals in a circle. I typically use white or a slightly darker pink for contrast. Let the petals dry for at least two minutes before adding the center. If you’re using regular polish, wait until the petals are completely dry to the touch—not just tacky. Rushing this step is the fastest way to muddy the design.
Add the Center
Dip a dotting tool—or the tip of a toothpick if you don’t have one—into a bright yellow or gold polish. Place a single dot in the center of the petals. That’s it. One dot. It anchors the entire flower. You can add tiny dots around the center for a daisy look, but a single dot keeps it clean and modern.
Seal It
Once the center is dry, apply a top coat. I use a quick-dry formula to minimize the risk of smudging. Apply it in one smooth stroke down the center of the nail, then one on each side. Don’t over-brush—you don’t want to drag the petals. Let the top coat dry for at least five minutes before doing anything with your hands.
Variations to Try
Once you’re comfortable with the basic flower, you can change the look with a few tweaks:
- Lavender sprigs: Instead of a circle, paint small oval strokes in a line, each slightly overlapping the next. Use a pale purple polish for the petals and a tiny green dot at the base.
- Wildflower clusters: Paint three or four tiny flowers in a loose group on one accent nail. Vary the petal colors—white, soft yellow, light pink—for a meadow feel.
- Negative space flowers: Leave the center of the nail bare and paint the petals only around the edges. This works beautifully on a sheer nude base.
Tools That Make It Easier
You don’t need a full art kit. A fine detail brush, a dotting tool (or toothpick), and three polish colors—base, petal, center—are enough. For the brush, look for one with synthetic bristles that hold a point. I clean mine immediately after use with acetone to keep the bristles from clumping. A small glass dish or a piece of aluminum foil works well for holding a few drops of acetone for cleaning between colors.
Common Pitfalls and How to Avoid Them
- Polish too thick: If your polish is old or gloopy, add a drop of polish thinner—not acetone. Thick polish won’t pull into a clean stroke.
- Uneven petal spacing: Before you start painting, imagine the face of a clock. Place the first petal at 12 o’clock, then 2, 4, 6, and so on. This keeps the flower symmetrical.
- Smudging during top coat: Use a top coat that’s thin and runny, not thick and gel-like. A thick top coat can push the petals out of shape. Apply it gently, letting the brush do the work.
Safety Notes
Nail polishes, removers, and cleansers contain chemicals that can irritate the skin or trigger allergic reactions in some people. Always work in a well-ventilated area. If you’re using gel polish, follow the manufacturer’s cure times exactly—under-curing can cause contact dermatitis. Keep all products out of reach of young children. For any persistent skin irritation or nail changes, consult a dermatologist.
Take your time with each step, and don’t worry if your first flower isn’t perfect. The beauty of hand-painted designs is that every one is slightly different—that’s what makes them look like real flowers.
Frequently Asked Questions
How do I keep hand-painted flowers from smudging?
Let each layer dry fully before adding the next. Use thin coats of polish—thick layers take longer to dry and are more prone to smudging. A quick-dry top coat seals the design once everything is dry.
What brush should I use for tiny flower petals?
A fine detail brush with a pointed tip, often labeled as a liner or striper brush, works well. Look for one with synthetic bristles that hold a sharp point. Clean it immediately with acetone after use to keep it from hardening.
Can I do this design with regular nail polish?
Yes, regular polish works well. The key is patience: thin coats and enough drying time between layers. Gel polish is more forgiving because it stays wet until cured, but regular polish can achieve the same look with practice.