
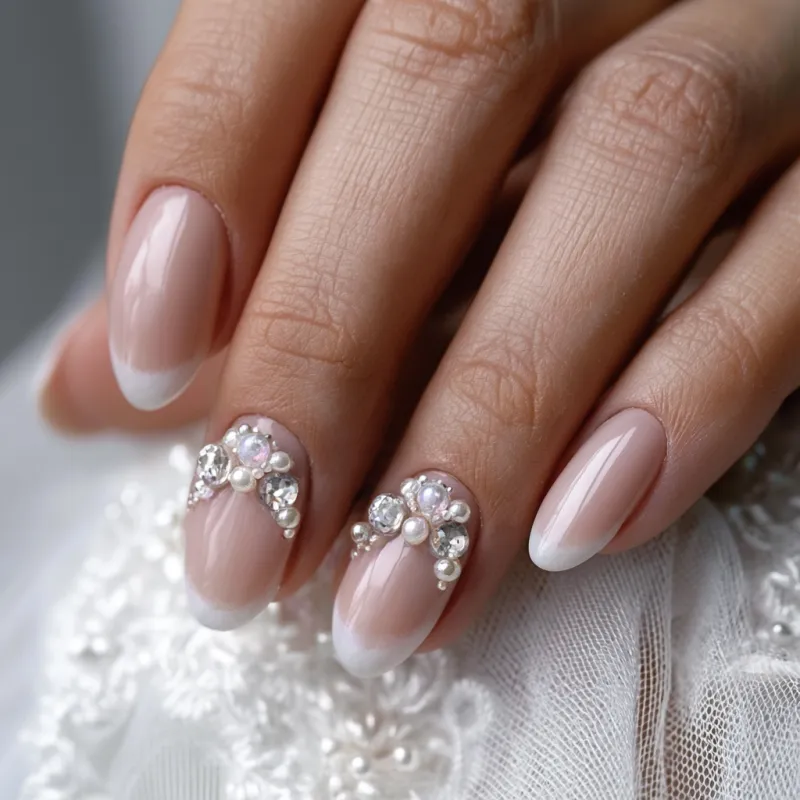
The first time I saw a spring bridal French manicure done right, it stopped me mid-step. The bride had a sheer pink base that let her natural nail bed show through, and the white tip wasn’t a stark line—it was soft, almost translucent at the edge, like a whisper of lace. That’s the kind of look I want to help you save for your next appointment.

Spring 2025 is all about bridal French nails that feel fresh, not dated. We’re moving away from opaque whites and thick, chalky tips. Instead, think jelly-like sheers, micro-floral accents, and a finish that glows from within. Here’s how to get that look—whether you’re doing it yourself or taking these ideas to your nail artist.
Start with the Right Base
The base sets the tone. For a spring bridal French, skip the solid pink or beige. Reach for a sheer, jelly-like gel in a soft blush or barely-there nude. I always apply two very thin coats, curing each under an LED lamp for 30 seconds. The goal is a translucent wash—enough to even out the nail tone, but not so opaque that it hides the natural nail’s texture.
Common mistake to avoid: applying the base too thick. Thick layers pool at the cuticles and create a lumpy surface. Thin coats, wiped on the brush before application, give that smooth, glassy finish. If you’re using regular polish, let each coat dry fully—about two minutes between layers.
The French Tip: Soft and Natural
For the white tip, I use a gel polish that’s slightly less pigmented than standard white. A milky white or even a soft ivory works beautifully. Paint the tip freehand, starting from one side of the nail and sweeping across the free edge in a single motion. Keep the smile line—the curve where white meets base—gentle and natural, not too high or too low.
Technique tip: if your hand isn’t steady, use a thin striping brush dipped in isopropyl alcohol to clean up the line before curing. The alcohol won’t disturb the uncured gel. Cure for 30 seconds. For a softer edge, try a reverse French—paint the white along the cuticle line instead of the tip. It’s unexpected and elongates the nail.
Add Micro-Floral Accents
This is where the spring bridal French nails truly come alive. On one or two accent nails per hand, add tiny floral details. I use a dotting tool and a fine detail brush. Start with a small dot of pale pink or lavender for the flower center, then add five tiny petals around it using a slightly darker shade. Keep the flowers small—no larger than a pencil eraser.
Alternative for beginners: use pre-made floral nail decals. Apply them over the cured top coat, press gently, and seal with another thin top coat. Decals give a consistent look without the freehand stress. Just make sure the decal is fully dry before sealing to avoid wrinkles.
Placement Matters
Place the floral accent near the cuticle or along the side of the nail, not dead center. This keeps the French tip visible and the overall design balanced. A single flower on the ring finger and a tiny bud on the thumb is enough—don’t overcrowd.
Seal It All In
The final top coat makes or breaks the manicure. I use a no-wipe gel top coat for maximum shine. Apply a thin layer, making sure to cap the free edge. Cure for 60 seconds. The result should feel glass-smooth with no tacky residue. If you’re using regular polish, wait 10 minutes before applying a quick-dry top coat, then let it set for another 15 minutes.
Safety note: gel products contain chemicals that can cause allergic reactions. Always patch test a small area of skin before full application. Work in a well-ventilated space, and never let uncured gel touch your skin. If you experience redness, itching, or swelling, consult a dermatologist.
Variations to Try
Not every bride wants the same look. Here are three twists on the spring bridal French:
- Metallic smile line: swap white for a soft gold or rose gold tip. Apply it the same way, but use a metallic gel that covers in one coat.
- Ombré French: blend the white tip into the sheer base using a sponge. Dab the white onto the free edge, then blend downward with a clean brush before curing.
- Barely-there accent: skip the white entirely on some nails. Just the sheer base with a single crystal or tiny pearl at the cuticle line.
Takeaway
Spring bridal French nails are about subtlety and precision. The sheer base, the soft tip, the tiny floral detail—each element works together to create a manicure that feels personal and polished. Take these techniques to your next appointment, or practice them at home with gel or regular polish. The result will be nails that look like they belong in a spring garden, without ever feeling overdone.
Frequently Asked Questions
What is the best base color for spring bridal French nails?
A sheer pink or barely-there nude works beautifully. It lets the natural nail peek through, giving a fresh, modern look. I recommend a jelly-like gel that builds opacity in thin layers—apply two for a soft wash of color.
How do I make French tips last longer without chipping?
Prep is everything. Gently buff the nail surface with a 180-grit file to remove shine, then wipe with alcohol. Apply a thin primer before the base coat. For the white tip, cap the free edge with each layer—this seals the tip and prevents lifting.
Can I add nail art to a French manicure without it looking too busy?
Absolutely. Stick to one or two accent nails per hand. Tiny floral decals, a single rhinestone at the cuticle, or a metallic line along the smile line keep it elegant. Avoid large designs that overwhelm the classic French shape.
What shape is best for spring bridal French nails?
A softly rounded square or an almond shape flatters most hands. The rounded square gives a clean, classic look, while almond elongates the fingers. Avoid sharp stilettos for a bridal feel—they can feel too edgy.