
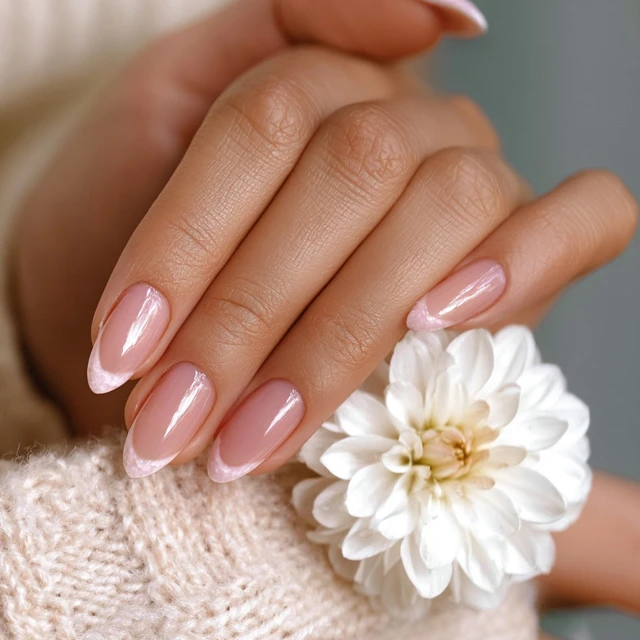
The first time I cooked a foil packet over an open fire, my nails caught the smoke and ash differently than they did at home. The heat from the coals, the grit of the cast iron handle, the constant wash of camp suds—it all tests a manicure. But Spring 2026 is bringing colored French tips into the campsite, and they hold up better than you think.

I keep the ratio simple: the colored tip should cover no more than one-quarter of the nail. That keeps the look fresh without making the tip feel heavy. And I choose non-toxic polishes—pastel green, lavender, peach—that won’t leach into food when I’m handling camp meals. Here’s how to get the look and keep it intact through a weekend of open-fire cooking.
Why Colored French Tips Work for Camp Cooking
Colored French tips are more forgiving than a full manicure. The tip color hides minor chips and smudges from handling foil, wood, and cooler handles. And because the base of the nail stays neutral or sheer, you don’t see every speck of ash. The pastel shades of Spring 2026—soft greens, lavenders, peaches—blend with the muted tones of outdoor gear. They look intentional, not accidental.
The Heat Factor
Non-toxic polishes are formulated without toluene, formaldehyde, and DBP. These chemicals can become unstable when heated, which is why I avoid them for camp cooking. A good non-toxic polish withstands the ambient heat of a campfire or camp stove—just don’t touch hot metal directly. Let the polish cure overnight before you cook. That extra drying time creates a harder surface that resists chipping.
Step-by-Step: The Spring 2026 Colored French Manicure
Start with clean, dry nails. Push back cuticles gently—don’t cut them, especially before a trip. Cuts get infected fast in the outdoors. File nails short and rounded. Long nails catch on tent zippers, foil edges, and cast iron handles. Short nails are safer and more practical.
Apply one thin coat of non-toxic base coat. Let it dry completely. Two minutes is enough if you’re in dry air. In humid conditions, wait four. Then apply two thin coats of your chosen base color. Pastel green is my go-to for spring. It matches the new leaves and doesn’t show dirt. Let each coat dry for three minutes.
Now the colored tip. Use nail tape or a stencil. Place it across the nail so the free edge is exposed. The tip should be exactly one-quarter of the nail length. Any longer and it overwhelms the nail. Any shorter and it looks like an accident. Apply one thin coat of the same or a contrasting color to the exposed tip. For a subtle gradient, apply a second thin coat only to the tip edge. Remove the tape immediately while the polish is still wet. This gives you a crisp line.
Let the tip color dry for four minutes. Then apply a thick top coat over the entire nail. Seal the tip edge with a light brush stroke—this is where most chips start. Wait ten minutes before touching anything. For best results, let the nails cure overnight before you cook. That means painting them the night before your trip, not the morning of.
Maintenance at the Campsite
Bring a small bottle of top coat with you. Reapply a thin layer each morning after you wash up for breakfast. This fills in any micro-chips and keeps the shine. When you handle foil packets, use your fingertips, not your nails. The same goes for opening cans or cutting rope. Gloves are a good idea if you’re doing rough work.
If a tip does chip, don’t panic. Because the base color is neutral, a small chip at the tip blends in. You can touch it up with the same color and a tiny brush, or just leave it. The chip will look like part of the design if it’s small enough.
Food Safety and Nail Polish
Non-toxic polish is safer for cooking, but it’s not edible. Always wash your hands thoroughly before handling food. Use warm water and camp soap for at least twenty seconds. If you have sensitive skin, test the polish on a small patch of nail a day before the trip. For any dietary or health concerns, consult a qualified professional.
Keep your nails short to avoid trapping food or dirt underneath. A short, rounded nail is easier to clean and less likely to harbor bacteria. Change your polish every two to three days if you’re on a long trip. Old polish can chip and flake into food.
Takeaway
Spring 2026 colored French tips are practical for camp cooking. They look good, hide dirt, and hold up to heat when you use non-toxic polishes and a thick top coat. Keep the tip ratio at one-quarter of the nail length. Paint the night before. Reapply top coat each morning. And always wash your hands before you cook. That’s how you keep your nails looking fresh through a weekend of foil packets and campfire skillets.
Frequently Asked Questions
Will colored French tips survive the heat of a campfire?
Yes, if you use a non-toxic polish with a thick top coat and let it cure fully overnight. The heat from a campfire or stove won’t damage the polish, but direct contact with hot metal or flames will. Keep nails away from open fire and hot pan handles.
What are the best Spring 2026 colors for a camp cook?
Pastel green, lavender, and peach are trending for Spring 2026. They’re subtle enough to hide minor dirt from camp cooking, and they pair well with neutral outdoor gear. Avoid dark colors that show every smudge.
How do I keep my manicure from chipping while handling foil packets?
Keep nails short and rounded. Use a thick top coat and reapply a thin layer each morning. When opening foil packets, use your fingertips, not your nails. Gloves are a good idea if you’re handling rough gear.