
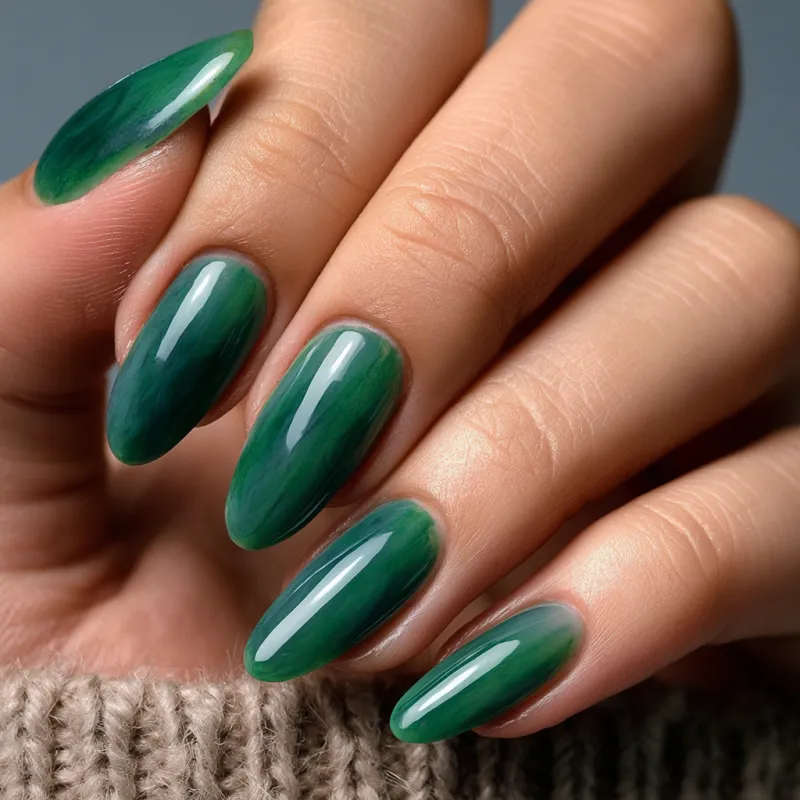
There’s a particular kind of light that hits a well-polished emerald green nail. It’s not just green—it’s a deep, liquid jewel tone that catches the eye. When the surface is smooth and the color is dense, it feels almost three-dimensional. That’s what we’re aiming for when you walk into the salon with emerald green inspo. But getting that result depends on technique, not just the shade.

The Prep That Makes Emerald Work
Dark colors are unforgiving. Every ridge, every bit of dust under the polish, every uneven edge shows. So before I even open the bottle, I focus on the nail plate. I start with a 180-grit file to shape the free edge—not to shorten, but to create a clean line. For emerald green, I prefer an almond or soft square shape; the color’s depth looks best when the nail has a gentle taper.
Next, I push back the proximal nail fold with a cuticle pusher. Not cutting—just gently loosening the thin skin attached to the nail plate. A dry pusher is safer than one dipped in oil, which can leave residue. Then I use a 240-grit buffer to lightly mattify the entire nail surface. The goal is to remove the natural shine without creating grooves. Over-buffing thins the nail and can lead to lifting. I stop as soon as the surface looks uniform and slightly chalky.
After buffing, I wipe with a lint-free pad soaked in 99% isopropyl alcohol. Lint-free is non-negotiable—cotton balls leave fibers that get trapped under the polish. I let the alcohol evaporate completely, about 30 seconds. Then I apply a thin layer of pH-bonding primer. This is a step many skip, but it makes a measurable difference in adhesion, especially with dense pigments.
Applying Emerald Green Gel Without Streaks
Emerald green gel can be tricky. The pigment is heavy, and it settles in the bottle. I always roll the bottle between my palms for at least 20 seconds—never shake, which introduces air bubbles. The first coat will look translucent and uneven. That’s fine. I apply it in three thin strokes: one down the center, then one on each side. I keep the brush slightly loaded but not dripping. The stroke should glide without pressure; if you press hard, you’ll push the gel into the cuticle, creating a ridge that later lifts.
Cure for the full recommended time. I use 60 seconds in a 48-watt LED lamp. Under-curing dark colors is a common mistake—the gel might feel hard on the surface but remain soft underneath, leading to peeling within days. After the first cure, I apply a second thin coat. This is where the color builds to its true emerald depth. I check for any spots near the cuticle or sidewalls where the gel might have flooded. If it has, I use a clean orangewood stick to gently scrape it away before curing.
The Secret to a Glass-Like Finish
Top coat makes or breaks the look. I use a no-wipe top coat for emerald green because it gives the highest shine without needing an alcohol wipe. I apply it thicker than the color coats—enough to self-level, but not so much that it pools in the sidewalls. I cap the free edge by brushing the tip of the nail with the top coat. This seals the layers and prevents chipping from the front. Cure for 60 seconds. The result should feel slick and smooth, like a polished gemstone.
Designs That Enhance the Emerald Base
Emerald green is strong enough to stand alone, but a subtle accent can elevate it. One of my favorite requests is a thin gold foil line placed just above the cuticle. I apply a tiny amount of clear gel over the cured top coat, place the foil with tweezers, then cure for 10 seconds before sealing with another layer of top coat. The key is to keep the foil flat—any wrinkles create bumps that catch the light wrong.
Another option is a chrome overlay. After curing the color and before top coat, I apply a thin layer of no-wipe top coat, cure, then rub chrome powder with a silicone spatula. For emerald, a gold or iridescent chrome creates a duochrome effect that shifts from green to bronze. I buff the powder until the surface is mirror-like, then brush off excess and seal with top coat.
What to Avoid With Dark Green Polish
Dark colors show every mistake. Flooded cuticles are the most common issue—the polish spreads onto the skin, and when it cures, it lifts within a day. Always leave a tiny gap between the polish and the proximal nail fold. If you see flooding, clean it immediately with a dry brush before curing. Also, avoid thick coats. Thick gel doesn’t cure evenly, which leads to wrinkling or tacky spots. Thin layers, patience, and proper curing are non-negotiable.
The Takeaway
Emerald green nails are about precision. The prep, the application, the finish—each step builds on the last. Show your nail tech a photo of the exact shade and finish you want, but trust them to adjust the technique for your nail shape and condition. A well-executed emerald green manicure doesn’t just look good—it stays good. And that’s the real mark of quality work.
Frequently Asked Questions
Why does emerald green gel sometimes look streaky or patchy?
Dark green pigments are dense and can settle in the bottle. Always roll (not shake) the bottle to mix, and apply thin, even coats. The first coat will look sheer—that’s normal. Cure fully between coats. A sticky dispersion layer after curing can also cause patchiness if you touch it before the next coat.
How can I make emerald green polish last longer without chipping?
The key is prep. Dehydrate the nail plate thoroughly with a lint-free wipe and alcohol or nail prep solution. Use a pH-bonding primer before the base coat. Cap the free edge with every layer—base, color, and top coat. Avoid soaking the nails in water for the first few hours after application.
Can I wear emerald green on short nails?
Absolutely. Emerald green looks striking on any length. For short nails, keep the shape square or slightly rounded to make the nail bed appear longer. Avoid heavy 3D embellishments; instead, use a single thin line of gold or a tiny chrome accent near the cuticle.
What skin tones does emerald green flatter most?
Emerald green is surprisingly versatile. It pops against fair and medium skin tones, and looks especially rich on deeper complexions. The finish matters too: a glossy emerald feels more classic, while a matte top coat gives a modern, muted effect that suits warmer undertones.