
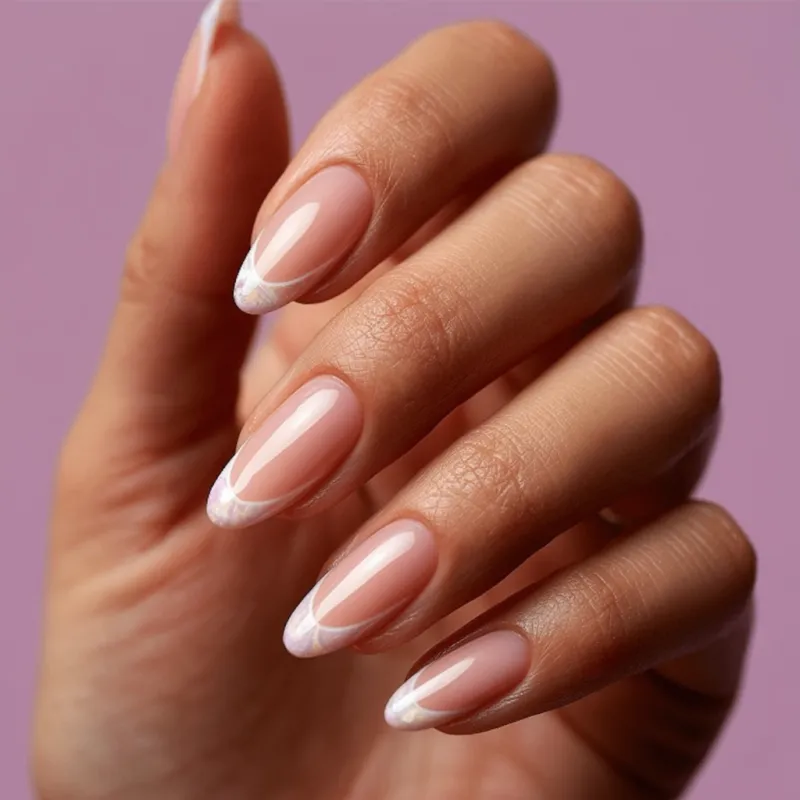
I love the moment when you look down at your freshly shaped nails and see that perfect almond curve—soft at the base, tapering to a gentle point. For Spring 2026, this classic shape is getting a fresh twist. The almond nail is everywhere, but not in the way you remember from last year. The new iteration is softer, more natural, and built on a foundation of nail health rather than extension length. Let me walk you through the exact shaping technique, the color palette that defines the season, and a DIY prep method that makes all the difference.

Why Almond Nails for Spring 2026?
The almond shape has always been a favorite because it elongates the fingers without the maintenance of stiletto or coffin shapes. For Spring 2026, the trend leans into a more organic silhouette—think a barely-there taper rather than a dramatic point. The sidewalls are filed at a gentle angle, creating a shape that mimics the natural almond nut. This version works beautifully on medium-length nails, making it accessible even if you grow your nails naturally. The key is balance: the apex of the curve should sit just above the cuticle line, and the free edge should form a smooth, continuous line from the sidewall.
My Exact Shaping Technique for the Perfect Almond
I always start with clean, dry nails—no polish, no oils. Oils can cause the file to slip, leading to uneven shaping. Here is my step-by-step method:
- Step 1: Choose the right file. I use a 180-grit file for natural nails. Anything coarser (like 80-grit) can tear the nail edge, leaving it rough and prone to peeling. A 180-grit file gives control and a smooth finish.
- Step 2: Establish the center point. Imagine a line running from the center of your cuticle to the tip of your finger. That is your guide. File from the sidewall toward this center line, holding the file at a 45-degree angle. Do not file straight across the tip—that creates a squoval, not an almond.
- Step 3: Work both sides equally. File three strokes on the left side, then three on the right. Check the shape after each set. The most common mistake is filing one side more than the other, creating a lopsided tip. I always look at the nail from the top and the side to ensure symmetry.
- Step 4: Smooth the tip. Once the sides are tapered, gently round the very tip with light, sweeping strokes. The tip should be a soft point, not sharp. If you can poke yourself with the nail, it is too pointed.
- Step 5: Buff the edge. Use a 240-grit buffer to run along the free edge. This removes any microscopic roughness and prevents snags on clothing or hair. The edge should feel smooth when you run your finger over it.
The Spring 2026 Color Palette for Almond Nails
This season, the colors are muted but not dull. Think powdered lilac, sage green with a hint of gray, warm peach, and a creamy off-white that reads almost like porcelain. The finish is glossy but not glass-like—a medium-shine top coat that lets the color breathe. I avoid chunky glitter or heavy foil accents because they disrupt the clean line of the almond shape. Instead, I add a single thin stripe of metallic gold or silver down the center of the nail for a subtle accent. The stripe follows the same center line I used for shaping, reinforcing the elongated look.
DIY Nail Prep Soak for Almond Shape
Before you shape, prep the nail plate. I created this simple soak because it hydrates without swelling the nail—swollen nails can distort the shape once they dry. Here is the recipe:
- Mix 1/2 cup warm water, 1 tablespoon coconut oil, 1 teaspoon raw honey, and 2 drops lavender essential oil in a small bowl.
- Soak fingertips for exactly 5 minutes. The oil and honey soften cuticles without dehydrating the nail plate.
- Gently push back cuticles with a wooden pusher. Do not cut them—cutting can lead to infection or over-trimming.
- Wipe nails dry with a lint-free wipe and let them air-dry for 2 minutes before filing.
This soak is gentle enough for weekly use. Store any leftover mixture in a sealed jar for up to three days. Always patch-test essential oils on a small skin area first, as lavender can cause irritation in some people.
Common Mistakes to Avoid
I see three issues repeatedly with almond shaping. First, filing the sidewalls too aggressively creates a weak point where the nail can break. The sidewall should remain straight for the first half of its length, then taper. Second, using a buffer on the nail plate too often thins the nail. Buff only once per manicure, and only enough to remove surface shine—about three light passes. Third, applying thick layers of polish on almond nails. The shape relies on clean lines, and thick polish blurs the taper. Use thin, even coats and let each layer dry fully before the next.
Takeaway
The Spring 2026 almond nail trend is about precision and health. By mastering the shaping technique and prepping your nails correctly, you can achieve a look that is both elegant and low-maintenance. Start with the soak, file with patience, and choose colors that let the shape shine. Your nails will thank you.
Frequently Asked Questions
What is the best nail length for an almond shape?
Almond nails work best when the free edge is at least 1/4 inch past the fingertip. Shorter almonds can look rounded rather than tapered. Aim for a length where the nail extends just beyond the finger pad for a balanced silhouette.
Can I get an almond shape on weak or brittle nails?
Yes, but strengthen your nails first. Use a ridge-filling base coat and a nail hardener for two weeks before filing into an almond shape. Avoid over-filing the sidewalls, which can create weak points. If your nails are peeling or splitting, consult a dermatologist for personalized advice.
What file grit should I use for shaping almond nails?
Use a 180-grit file for shaping the sides and tip. This grit is fine enough to avoid tearing the nail edge but coarse enough to shape quickly. Finish with a 240-grit buffer to smooth any rough edges. Never use a coarse 80-grit file on natural nails—it can cause micro-fractures.