
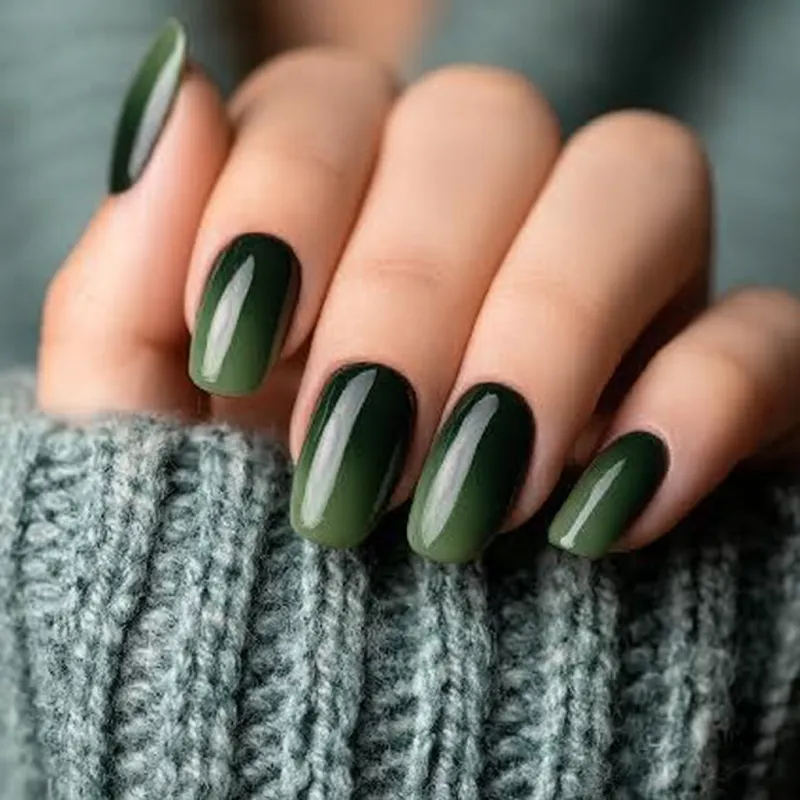
There’s a color that walks into the room and just settles everything. Sage green is that color. It’s not loud, not timid. It’s earthy, sophisticated, and—when done right on nails—absolutely mesmerizing. I’ve been applying acrylics for years, and sage green remains one of my most requested shades. But here’s the thing: sage green can go wrong fast. If the application is lumpy, the color looks muddy. If the apex is off, it feels heavy. So let me walk you through the exact method I use to get a smooth, durable, and truly beautiful sage green acrylic set.

Prep That Actually Matters
You’ve heard it a hundred times: prep is everything. But with sage green, prep is especially critical because any imperfection shows through this muted tone. I start by pushing back the cuticles gently with a wooden stick—never cutting unless there’s a hangnail. Then, I use a 180-grit file to lightly buff the natural nail plate. Not to remove shine entirely, but to create a slight texture. The key here is light pressure. You want to break the surface, not thin the nail. After that, I wipe every nail with a lint-free wipe soaked in acetone. No oils, no dust, no residue. The nail plate should look matte and feel clean to the touch.
Mixing the Perfect Bead
For sage green, I use a medium-viscosity monomer—not too fast, not too slow. I dip my brush, wipe one side, and pick up a small bead of acrylic powder. The ratio is roughly 1.5 parts monomer to 1 part powder. The bead should look wet and rounded, not dry and crumbly. I place it just behind the cuticle, then gently push it toward the free edge. The color should self-level slightly. If it’s too thick, it won’t flow; if too wet, it’ll run. You want that perfect dome that flattens with a light pat.
Apex Placement: The Hidden Structure
This is where many sets fail. The apex—the thickest part of the acrylic—needs to sit at the stress point, about one-third of the way down from the cuticle. For sage green, I build the apex with a slightly larger bead, then smooth it out with a brush dipped in monomer. I let it self-level for about 10 seconds before I start shaping. The result is a nail that looks graceful but is structurally strong. Without this, sage green acrylics can lift or feel top-heavy.
Shaping with Precision
Once the acrylic is fully cured (I wait a full 3 minutes—no rushing), I begin shaping. I use a 100-grit file to remove bulk, then switch to a 180-grit for the final shape. For sage green, I prefer a short almond or a classic oval. The soft curve complements the muted color. I file in one direction only—back and forth creates heat and can crack the acrylic. Pay special attention to the sidewalls. They should be straight and smooth, not pinched. Run your finger along the edge; it should feel seamless.
The Finish That Makes It Shine
After shaping, I use a 240-grit buffer to smooth the surface, then a 4000-grit buffer for a mirror-like shine. No top coat needed if you buff correctly—but I always apply a high-gloss, non-yellowing top coat anyway. It seals the color and adds that wet look. Cure it under a UV/LED lamp for 60 seconds. The sage green should look deep, rich, and almost liquid.
Common Mistake: Over-filing the Color
I see this a lot. Someone files too aggressively and the green fades into a chalky, uneven mess. The fix? Use a light hand. Let the file do the work. If you see white dust, you’re taking off too much. Stop and check your progress frequently.
Safety First
Acrylic monomers and powders can irritate skin and trigger allergies. Always work in a well-ventilated area. If you’re sensitive, do a patch test on your arm 24 hours before. And never use a drill or files on natural nails without training—over-filing can cause permanent damage. For any persistent pain or infection, see a doctor immediately.
Takeaway
Sage green acrylics are a statement of quiet confidence. But they only work when the technique is solid. Focus on prep, apex placement, and gentle filing. The color will do the rest. With practice, you’ll get that perfect set every time.
Frequently Asked Questions
How do I prevent my sage green acrylics from turning yellow?
Yellowing is often caused by using too much monomer or not sealing the acrylic properly. Use a high-quality monomer-polymer ratio (I aim for a 1.5:1 ratio for a wet, self-leveling bead). After shaping, apply a UV-protective top coat and avoid prolonged sun exposure or harsh chemicals without gloves.
What skin tones does sage green flatter?
Sage green is wonderfully versatile. It’s a muted, earthy green with gray undertones, so it complements both warm and cool skin tones. For fair skin, it creates a soft contrast; for deeper skin tones, it provides a sophisticated, grounding effect. The key is the finish—a high-gloss top coat makes it pop on all complexions.
Can I do sage green acrylics at home as a beginner?
Acrylic application has a steep learning curve, especially maintaining a proper apex and avoiding lifting. I recommend starting with a professional application for the first few sets. If you attempt it at home, practice on tips first, use a slow-curing monomer, and focus on a thin, even application. Watch for heat spikes during curing.