
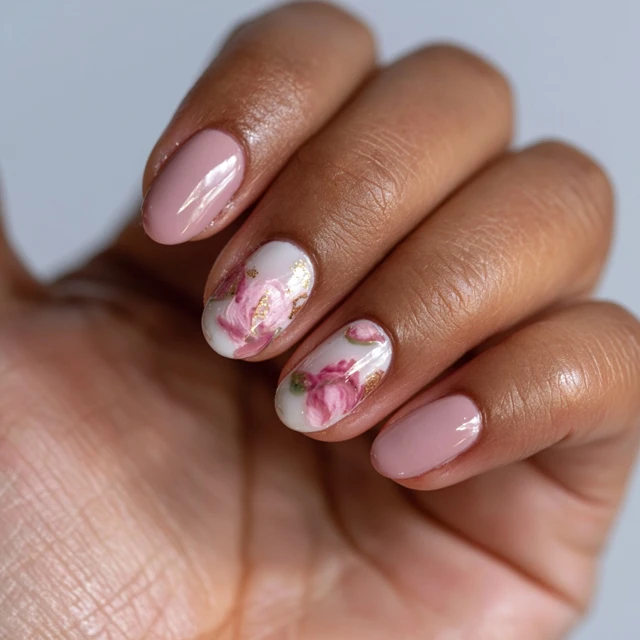
There’s a quiet magic in a nail design that doesn’t shout. Dainty floral nail art—tiny blossoms scattered like wildflower seeds across a pale canvas—whispers elegance. It’s the kind of manicure that catches light and glances, not attention. When I sit in the salon chair, I save these delicate patterns in my mind: the ratio of petal to negative space, the precise placement of a single leaf, the way a soft lavender center anchors a pink bloom.

Why Dainty Floral Nail Art Works
The key is restraint. A single flower per nail, or two at most, keeps the look airy. I keep the ratio at 70% bare nail to 30% design. This prevents clutter and lets each tiny blossom breathe. The technique relies on thin polish and a steady hand—no thick layers that blur the petals. For the petals, I use a dotting tool or a fine brush (size 00) to place five small dots in a circle. Each dot should be about the size of a poppy seed. The center gets a single dot of a contrasting color, like soft lavender against pale pink.
Choosing Your Color Palette
Stick to two or three colors maximum. A sheer white or nude base is non-negotiable—it mimics the natural nail and makes the flowers appear painted on air. For the blooms, pale pink, soft lavender, or mint green work beautifully. Avoid neon or dark shades; they overwhelm the dainty effect. If you want a hint of glamour, add a single tiny gold foil flake to the center of one flower per hand. Place it while the polish is still tacky, then seal immediately.
The Technique: Petal Placement
Start with a clean, dry base coat. Apply two thin coats of your base color, letting each dry fully. Dip your fine brush into the chosen petal color and wipe off excess on the bottle rim—you want just a whisper of polish. Touch the brush to the nail in a gentle arc, not a stab. For the petals, work outward from a central point. If you’re using a dotting tool, press lightly and lift straight up. The common mistake is pressing too hard, which flattens the dot into a blob. Keep the pressure even and minimal.
Adding Leaves and Accents
Leaves should be tiny—no longer than the flower’s diameter. Use a mint or soft green and paint two curved strokes on either side of the bloom. I find a single stroke per leaf is enough. Overworking the leaf makes it muddy. If you want a scattered look, add a few loose dots in the same green near the cuticle or tip. These act as visual anchors.
Longevity Tips for Your Appointment
Ask your nail technician to cap the free edge with top coat—this seals the design and prevents chipping. For gel polish, cure each layer fully under the UV/LED lamp. The recommended cure time is 30–60 seconds for most lamps. If you’re using regular polish, wait at least 10 minutes between layers to avoid smudging. A final thick layer of top coat is essential. I prefer a glossy finish for dainty florals; matte can mute the delicate colors.
Adapting for Home or Travel
If you’re doing this yourself before a camping trip, pack a small nail kit with your chosen polishes, a dotting tool, and a quick-dry top coat. Apply the design the night before you leave, so the polish has time to fully harden. Avoid heavy hand use (like chopping vegetables or setting up a tent) for at least 2 hours after finishing. The design will last 3–5 days with proper care, even in outdoor conditions.
Common Mistakes to Avoid
Rushing the drying time is the biggest culprit. Each layer needs to be bone-dry before the next. Another mistake is using too much polish on the brush—wipe it nearly clean. If a petal smudges, let it dry, then gently remove it with a clean-up brush dipped in remover, and redo just that spot. Don’t try to fix a smudge by painting over it; it will only get worse.
Final Takeaway
Dainty floral nail art is about precision and patience. Save these designs for your next appointment—they’re timeless, versatile, and surprisingly easy to maintain. Whether you choose a single bloom on each nail or a scattered garden, the result is a manicure that feels like a secret. One that you’ll keep glancing at, smiling at the tiny petals that caught the light just so.
Frequently Asked Questions
How do I keep dainty floral nail art from smudging?
Let each layer dry completely before adding the next. Use thin coats of polish and a quick-dry top coat. Avoid touching anything for at least 15 minutes after finishing.
Can I do dainty floral nail art at home without a fine brush?
Yes, use a dotting tool or even a toothpick. For petals, dip the tool into polish and press gently in a circular pattern. It won’t be as precise, but you can still get a charming, organic look.
What base color works best for dainty floral designs?
Sheer white, pale nude, or soft blush are ideal. They let the floral colors pop without overwhelming the design. Avoid dark bases if you want a truly dainty feel.
How long does dainty floral nail art typically last?
With proper application and a good top coat, it can last 5–7 days on natural nails and up to 2 weeks with gel. Reapplying top coat every few days helps.