
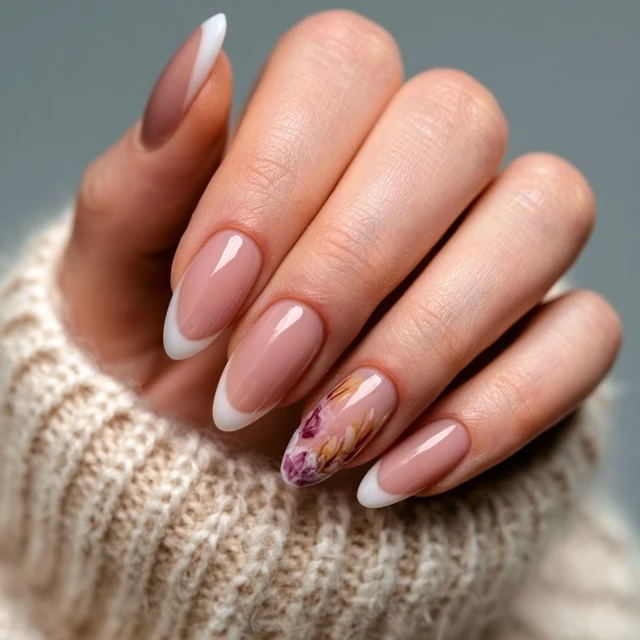
The first time I got short almond acrylics, I thought they’d last forever. Three days later, I snagged one on a zipper and watched it pop off like a bottle cap. That was the day I learned that acrylics—even short ones—need a little campfire-level care between appointments. You don’t need a full salon kit. You need a routine and a few tools that fit in a pouch.

Why Short Almond Acrylics Need Mid-Appointment Love
Short almond acrylics are practical. They don’t catch on everything, they look clean, and they let you type and cook without drama. But the shape—tapered sides, rounded tip—puts stress on the sidewalls and the apex. If you ignore them for two weeks, lifting starts at the cuticle, dirt creeps under, and your next fill becomes a full rebalance. I keep the ratio of oil to alcohol wipes at about 3:1 in my routine: three days of oiling to one day of alcohol wipe for deep cleaning. That keeps the acrylic dry at the base and flexible at the surface.
The 5-Minute Maintenance Sequence
This is not a full soak-off. This is a quick reset. Do it every three to four days, and your acrylics will stay put until your next appointment.
Step 1: Warm Water Soak (2 Minutes)
Fill a small bowl with water warm enough to feel comfortable on your wrist—around 100°F. Dip your fingertips for two minutes. This softens the cuticle and any debris that’s wedged itself under the free edge. Do not soak longer; acrylic absorbs water and can soften if left in for more than five minutes. Think of it like preheating a cast iron skillet—you want it warm, not soaked.
Step 2: Gentle Cuticle Push (30 Seconds)
Use a soft toothbrush (dedicated for nails) to gently brush the cuticle area in small circles. This lifts dead skin without cutting. If you use a metal pusher, you risk scratching the acrylic surface—scratches become weak points. I brush until the cuticle looks slightly pushed back, about 10 circles per nail. Rinse and pat dry with a lint-free wipe.
Step 3: Alcohol Wipe (30 Seconds)
Dampen a lint-free wipe with 70% isopropyl alcohol. Wipe each nail—top, sides, and the underside of the free edge. This removes oils, lotion, and any food residue (yes, even campfire chili gets under there). If you skip this step, your cuticle oil won’t absorb properly, and the acrylic will feel greasy. Do not use acetone between fills—it will break down the acrylic surface.
Step 4: Buff the Apex Only (1 Minute)
Take a fine-grit buffer (180-240 grit). Buff the apex—the thickest part of the nail—with two to three gentle passes. Do not buff the cuticle area or the free edge. The goal is to smooth any tiny ridges or roughness that could catch on fabric. Over-buffing thins the acrylic and weakens the structure. I check by running a fingertip over the nail—if it feels smooth without shiny spots, I stop.
Step 5: Cuticle Oil (1 Minute)
Apply one drop of cuticle oil to each nail. Massage it into the cuticle, the nail plate, and the underside of the free edge. The oil keeps the acrylic flexible and prevents it from becoming brittle. I use jojoba-based oil because it mimics the skin’s natural sebum and absorbs quickly. Wait 5 minutes before using your hands. Do not wash them immediately—the oil needs time to penetrate.
What to Avoid Between Appointments
Three things kill short almond acrylics faster than anything: water trapping, picking, and harsh chemicals. When you wash dishes or shower, wear gloves. When you feel a lifted edge, do not pick at it—picking creates a gap that fills with moisture and bacteria. When you use hand sanitizer or cleaning wipes, avoid letting them sit on the nails. Wipe them off quickly.
If you camp or cook over a fire, keep your nails away from direct heat. Acrylic softens at around 150°F—hot enough to warp if you hold a pan handle too long. I use a silicone pot holder or a towel to grip hot handles, and I never use my nails to pry open a foil packet. Use a fork or a tool instead.
When to Book That Fill
You’ll know it’s time when you see light at the cuticle—a gap between the acrylic and the natural nail. That gap is about 1/8 inch when it’s time. If you wait longer, the acrylic becomes a lever, and a single bump can pop the whole nail off. Book your appointment when you see that gap, not after you break one.
Takeaway: Short almond acrylics are durable if you treat them right. A five-minute routine every few days—soak, push, wipe, buff, oil—keeps them looking fresh and prevents the common breakage that sends you back to the salon early. Save these steps for your next appointment, and you’ll get more wear out of every set.
Frequently Asked Questions
How long can I go between fills with short almond acrylics?
Typically 2-3 weeks. If you maintain them well with oiling and avoid heavy use, you might stretch to 4 weeks. Watch for lifting at the cuticle or free edge—that’s your cue to book.
Can I shower or wash dishes with short almond acrylics?
Yes, but wear gloves for prolonged water exposure. Water seeping under the acrylic causes lifting and bacteria growth. Pat nails dry immediately after washing.
What should I do if a short almond acrylic cracks before my appointment?
Do not glue it yourself—that traps bacteria. Apply a small piece of medical tape or a nail patch as a temporary fix, then see your nail tech within 48 hours.