
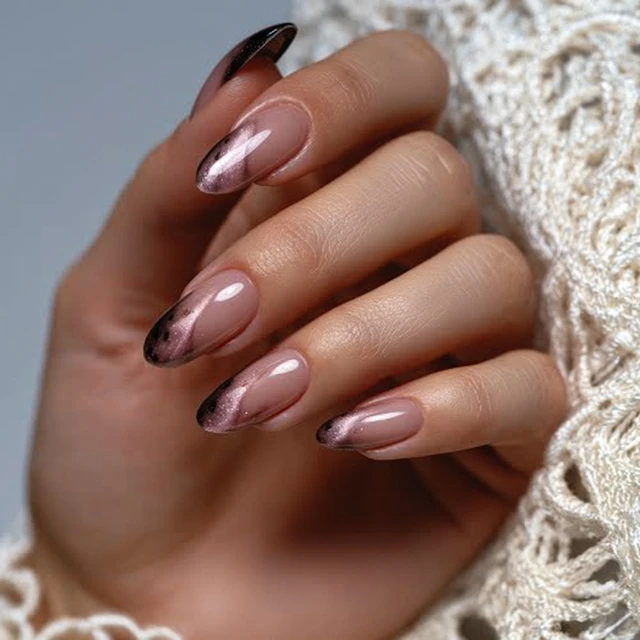
The first warm breeze of spring makes me want to shed the dark, heavy polishes of winter. I crave something lighter, fresher — something that actually looks like the season. That’s when I reach for pastels. But wearing just one pastel shade feels a little flat. I want more. That’s where color blocking comes in.

Color blocking is simply painting sections of the nail in different colors, separated by a clean line. It’s modern, playful, and surprisingly easy once you know the trick. The key is contrast and crisp edges. Here’s how to get that spring pastel color block manicure without the salon price tag.
Why Pastels Work for Color Blocking
Pastels have a soft, muted quality that blends well together. Unlike neons or dark shades, pastels don’t fight for attention. They sit beside each other comfortably. That makes them perfect for color blocking — you get a clear visual separation without harshness.
My go-to spring trio is pastel pink, lavender, and mint green. But you can swap in butter yellow, peach, or baby blue. The rule I follow: choose two to three shades that are similar in tone (all soft, all muted) but different enough in hue to see the block.
Tools You Actually Need
You don’t need a kit. Here’s what matters:
- Base coat and top coat — non-negotiable for longevity and shine.
- Two to three pastel nail polishes — thin formulas work best.
- Nail tape or striping tape — the cheap stuff from a beauty supply store is fine.
- Tweezers — for handling the tape without oils from your fingers.
- Cotton swabs and nail polish remover — for cleanup.
I use a fast-drying top coat. It saves time and reduces the chance of smudging the color blocks.
The Technique: Step by Step
1. Prep and Base Color
Start with clean, dry nails. Push back cuticles gently, but don’t cut them. Apply one coat of base coat and let it dry completely — about 2 minutes. Then apply two thin coats of your lightest pastel (usually mint green or butter yellow) to the entire nail. Let each coat dry fully. This is your foundation color.
Common mistake: rushing. If the base color isn’t dry, the tape will lift it. Wait an extra minute.
2. Tape for the First Block
Once the base is dry, cut a small strip of nail tape. Place it diagonally across the nail — from the top corner to the opposite side — to section off the area you want to keep the base color. Press the tape down firmly with your finger or a cuticle pusher, especially along the edge where the new color will meet it.
Use tweezers to handle the tape. Oils from your fingers can weaken the adhesive.
3. Apply the Second Color
Paint one thin coat of your second pastel (lavender, for example) over the exposed section of the nail. Brush from the center outward toward the tape to avoid pushing polish under the edge. Remove the tape immediately, while the polish is still wet. Pull it off slowly at a 180-degree angle — straight back, not upward.
Let that coat dry for 2 minutes. Then apply a second thin coat for full opacity, repeating the taping and removal process.
4. Add a Third Block (Optional)
For a three-color block, wait until the second color is dry — about 5 minutes. Place a new strip of tape at a different angle, covering part of the second color. Apply the third pastel (pink, for instance) to the remaining exposed area. Remove tape immediately. Apply a second coat if needed, letting it dry between coats.
5. Seal and Finish
Once all color blocks are completely dry, apply one coat of fast-drying top coat. Seal the entire nail in one smooth stroke. Let it dry for 10 minutes. Clean up any stray polish around the cuticles with a small brush dipped in remover. Finish with cuticle oil.
Visual cue: The top coat should look glassy and smooth, with no ridges where the tape was.
My Angle: The 2:1 Color Ratio
Here’s a tip you won’t find on every other site: use a 2:1 ratio for the color blocks. That means one color takes up about two-thirds of the nail, and the other color (or two colors) takes up the remaining third. This keeps the design balanced and prevents it from looking like a messy patchwork. For a three-color block, I split the nail into 50/25/25. The largest block is always the lightest pastel — it grounds the design.
This ratio works because the eye naturally rests on the larger area. The smaller blocks become accents. It’s a simple trick that makes the manicure look intentional and polished.
Adapting for Different Nail Shapes
On square or squoval nails, diagonal lines create a sharp, modern look. On almond or oval nails, try horizontal blocks — they follow the curve of the nail bed and look softer. For short nails, stick to two colors and a single diagonal line. Too many blocks can make short nails look stubby.
Common Mistakes to Avoid
- Thick polish coats. Thin coats dry faster and create less bulk under the tape. Thick coats peel or smudge when you remove the tape.
- Lifting the tape too fast. Pull it off slowly and straight back. Yanking it upward can lift the base color.
- Skipping the base coat. Pastels are sheer. Without a base coat, the natural nail color can peek through, muddying the pastel.
- Not waiting for drying. Each layer needs to be dry to the touch before the next step. I count to 60 after the last coat before handling anything.
Takeaway
A spring pastel color block manicure is one of those looks that feels high-end but takes only a little patience and the right technique. The crisp lines, the soft colors, the way the blocks play off each other — it’s a small thing that makes you feel put together. And the best part? You can change the colors with the season. Pastel pink and coral for late spring. Lavender and peach for early summer. The method stays the same.
Frequently Asked Questions
How do I get clean lines with nail tape?
Make sure your base color is completely dry before applying tape. Press the tape down firmly along the edges to prevent polish from seeping underneath. Remove the tape immediately after applying the second color, while the polish is still wet.
What are the best pastel color combinations for spring?
Classic combos include pink and mint green, lavender and butter yellow, or peach and baby blue. For a modern look, try three shades in a gradient from light to medium pastel.
How long does a pastel color block manicure last?
With proper application and a good top coat, a color block manicure can last 5-7 days. Avoid prolonged water exposure and wear gloves for chores to extend wear.
Can I do color blocking on short nails?
Yes. Use narrower color blocks and simpler angles (like a diagonal split) to avoid a cluttered look. Pastel colors can actually make short nails appear longer.