
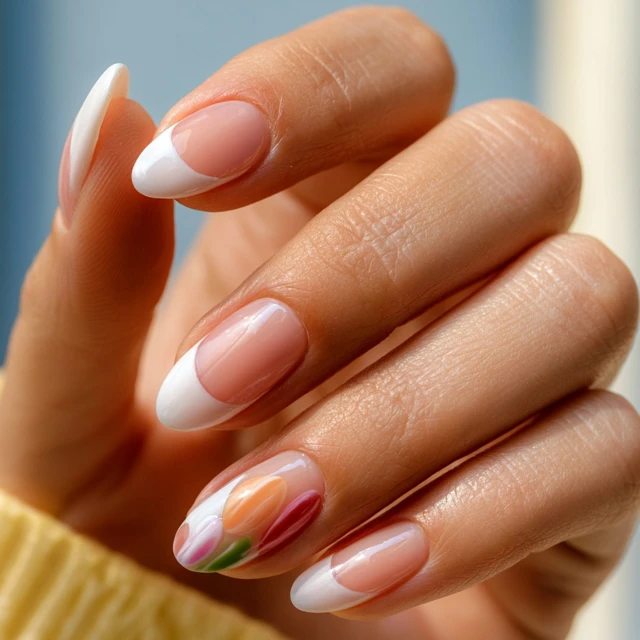
The first thing you notice is the color. Not just any orange, but the deep, saturated hue of a ripe navel. Then the yellow, sharp as a lemon wedge. And finally, a thin line of green that makes everything pop. That’s the magic of a good citrus nail design. It’s not just a manicure; it’s a statement that summer has arrived.

Why Citrus Nails Work for Summer
Citrus nails are the perfect summer manicure because they’re bright, cheerful, and instantly recognizable. They evoke fresh-squeezed juice, sunny days, and outdoor picnics. The contrast between the white base and the vivid fruit colors creates a clean, graphic look that works with any outfit, from a swimsuit to a sundress. Plus, they’re surprisingly easy to do at home.
What You’ll Need
You don’t need a professional kit. Here’s the short list:
- Base coat – to protect your nails and help polish adhere.
- White polish – a creamy, opaque white is best. Avoid sheer or glittery whites.
- Bright orange, yellow, and green polishes – go for high-pigment, one-coat formulas if possible.
- Dotting tool or toothpick – for the center and segments.
- Detail brush or striper brush – for the rind and fine lines.
- Top coat – a quick-dry top coat will save you time and prevent smudging.
The Technique: Getting That Juicy Look
The key to a realistic citrus nail is the white base. It acts like a blank canvas, making the fruit colors pop. Apply two thin coats, letting each dry completely. This prevents streaks and gives you a smooth surface.
Step 1: The Center Dot
Using your dotting tool, place a small dot of orange (or yellow or green) polish in the center of the nail. This is the core of the fruit. Don’t make it too big – about the size of a pinhead is perfect.
Step 2: The Segments
Now, with the same dotting tool or a small brush, create wedge-shaped segments radiating from the center dot. For an orange, use a slightly darker orange or even a tiny bit of red to create the lines. For a lemon, use a pale yellow or white. The segments should be even, like slices of a pie. A common mistake is making them too thick or uneven. Practice on a piece of paper first if you’re unsure.
Step 3: The Rind
Using your detail brush, paint a thin green line around the edge of the citrus slice. For a more natural look, make the line slightly uneven – thicker in some spots, thinner in others. This mimics the actual rind of a fruit. Let this dry for a minute.
Step 4: The Top Coat
Apply a generous layer of top coat. This seals the design and gives it that glossy, juicy shine. Be careful not to drag the brush through the design. If you do, wait a few seconds and try again with a clean brush. Let it dry for at least 10 minutes before touching anything.
Variations to Try
Once you’ve mastered the basic slice, you can experiment. Try a whole fruit design by painting the entire nail orange and adding a small green leaf at the cuticle. Or do a gradient effect with different citrus fruits on each nail. For a more subtle look, use a sheer yellow base and white segments for a lemon-inspired design.
Common Mistakes and How to Avoid Them
- Smudging: Wait for each layer to dry completely. Use a quick-dry top coat and spray if needed.
- Uneven segments: Use a dotting tool with a consistent pressure. Practice makes perfect.
- Rind too thick: A thin, slightly uneven line looks more realistic. Use a striper brush for better control.
Takeaway
Citrus nails are your shortcut to a summer-ready manicure. With a little patience and the right technique, you can create a design that looks like it came from a salon. The best part? You get to enjoy that burst of color every time you look at your hands. So grab your polishes and give it a try – you’ll see why these nails are the ones everyone wants to screenshot.
Frequently Asked Questions
How long does this citrus nail design last?
With a good base and top coat, expect 5-7 days of wear. Avoid using nails as tools to extend life.
Can I use gel polish for this design?
Yes, but you’ll need a UV/LED lamp and cure each layer. The process is similar, but use gel-specific polishes.
What if I don’t have a dotting tool?
A toothpick, bobby pin, or the tip of a pen can work. Just clean it between uses.
How do I make the citrus slices look more realistic?
Use a slightly different shade for the segments (e.g., pale orange for the lines) and a thin, slightly uneven green rind. A matte top coat can also give a more natural fruit skin look.